
Indoor Seed Starting Supplies
Successful indoor seed starting begins with quality supplies. With so many choices on the market, it’s difficult to narrow down what is truly needed to grow healthy vegetable, herb, and flower starts for your garden. This post discusses the necessary and optional equipment as well as the dedicated space and a bit about seed expiration dates. It’s best to start small with your indoor seed starting endeavor, experience success, and build on that in future years.
EQUIPMENT
Seeds can be started in any container with soil and drainage holes, from recycled yogurt containers to professional-grade seed trays as long as they are at least 2 inches deep. If you plan to start seeds every year, a variety of trays and pots are available and worth the investment.
TRAYS, INSERTS, POTS, DOMES
If you plan to use plastic seed trays, invest in high quality ones that can be cleaned and reused year after year. The 1020 seed tray is the industry standard and it measures about 10 inches by about 20 inches and about 2.5 inches deep. These are available with drainage holes and without.
Having a tray with holes is not absolutely necessary but allows for easy bottom watering of seedlings. This helps to prevent mold issues and encourages root growth.
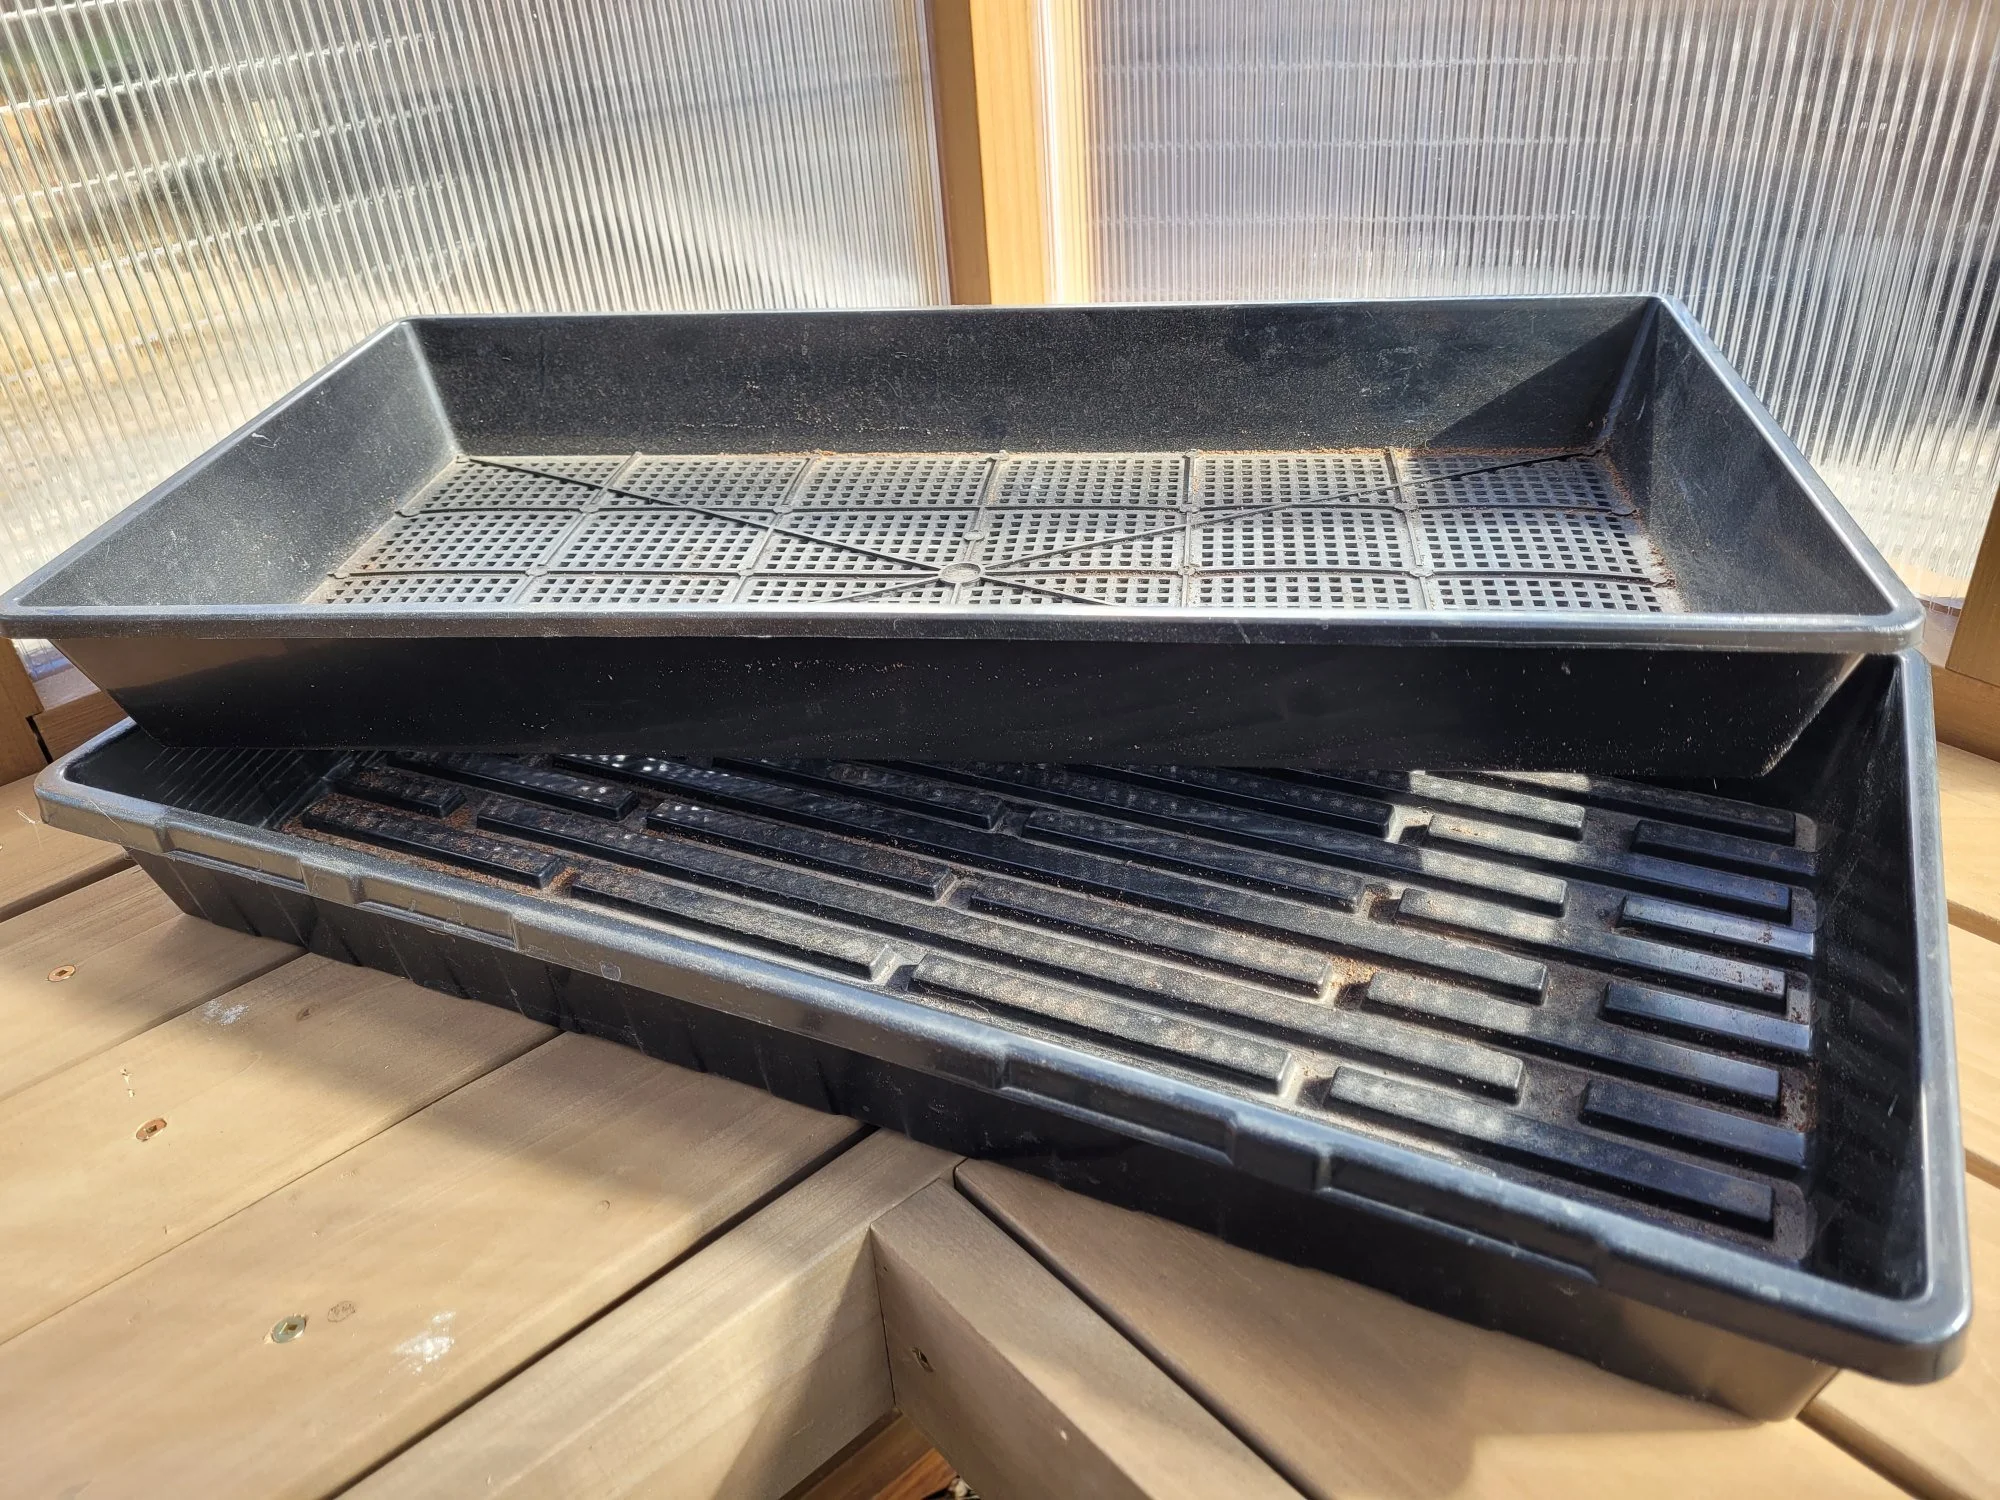
My well-used (and dirty) 1020 tray with holes & 1020 tray without holes from Bootstrap Farmer.
When planting seeds, it's recommended to keep them covered and humid until they germinate or start to grow. To do this, you can purchase humidity domes that fit your trays or simply use plastic wrap with some holes for ventilation. I’ve had luck with both methods.
In addition to the trays, you’ll need inserts. When shopping for these, carefully read all product descriptions to be sure cell inserts fit properly with your trays. For this reason, purchasing a complete kit may be a good idea if you’re just starting out with seed starting (see recommendation below). Trays and inserts come in a variety of sizes:
1010 - 10 inch x 10 inch trays
1020 - 10 inch x 20 inch
Other - brand specific
Cell inserts are available in 4 cell up to 90 cell to fit the 1020 tray. A 90 cell tray can be a bit much for the home gardener that’s only growing a few vegetables.

I prefer the 4 cell or 6 cell inserts because I grow a large variety of seedlings but not a lot of any one type.
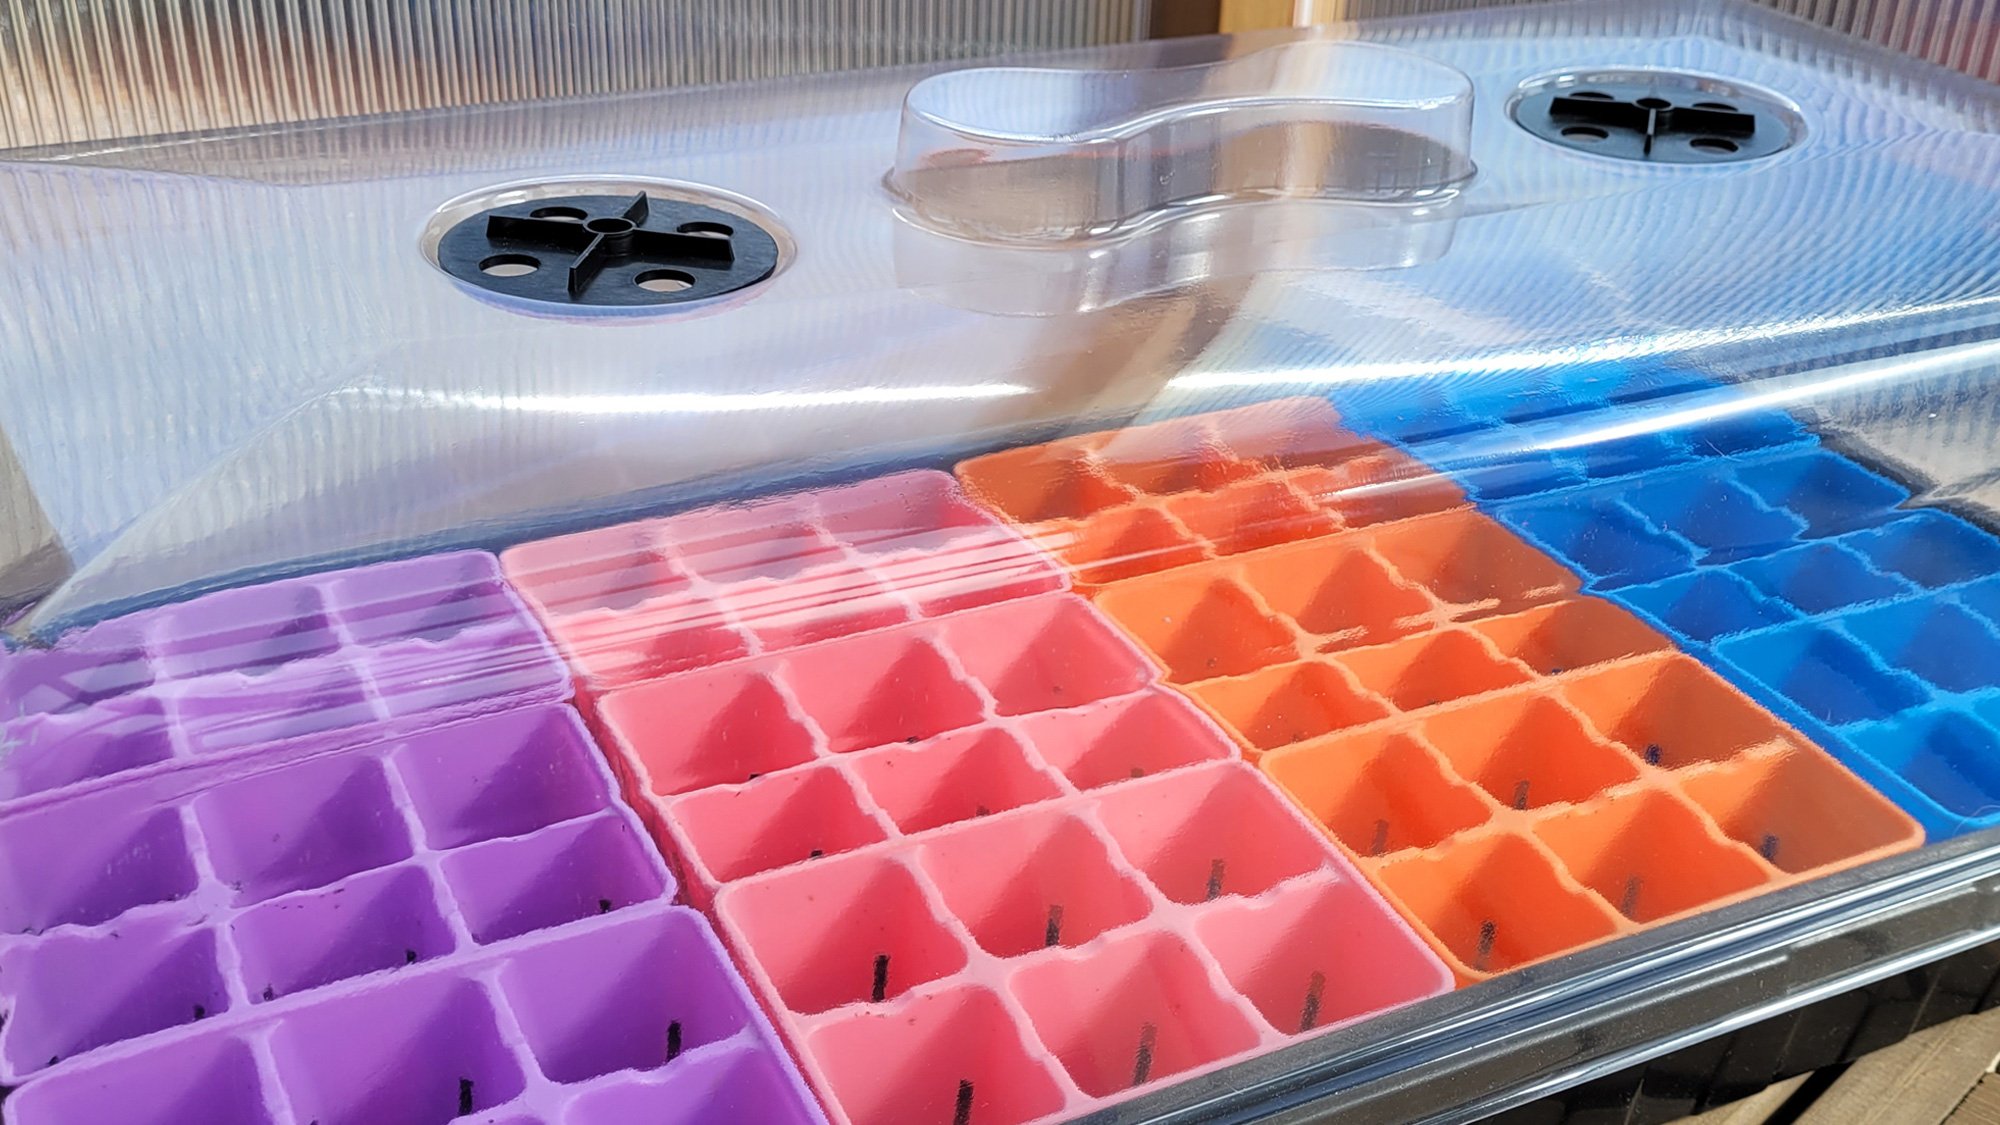
Colorful 6-cell inserts, 1020 tray with holes, and 1020 tray without holes from Bootstrap Farmer.
As the seedlings grow, they will need to be transplanted into a larger container unless they can be planted outdoors. Use pots that also fit into your 1020 trays. Most seed starts will be fine in a 2.5” pot but some, like tomatoes, may need a bit larger (3.5”-4.5”). I either use 2.5” or a recycled ½ gallon milk carton (just under 5”) with the tops cut off and holes in the bottom. These are a little large and take up more space and soil. Sometimes, I’ll reuse pots from purchased plants, making sure to clean them before using to prevent disease spread.
Larger pots are handy for potting up seedlings when they outgrow their cells.
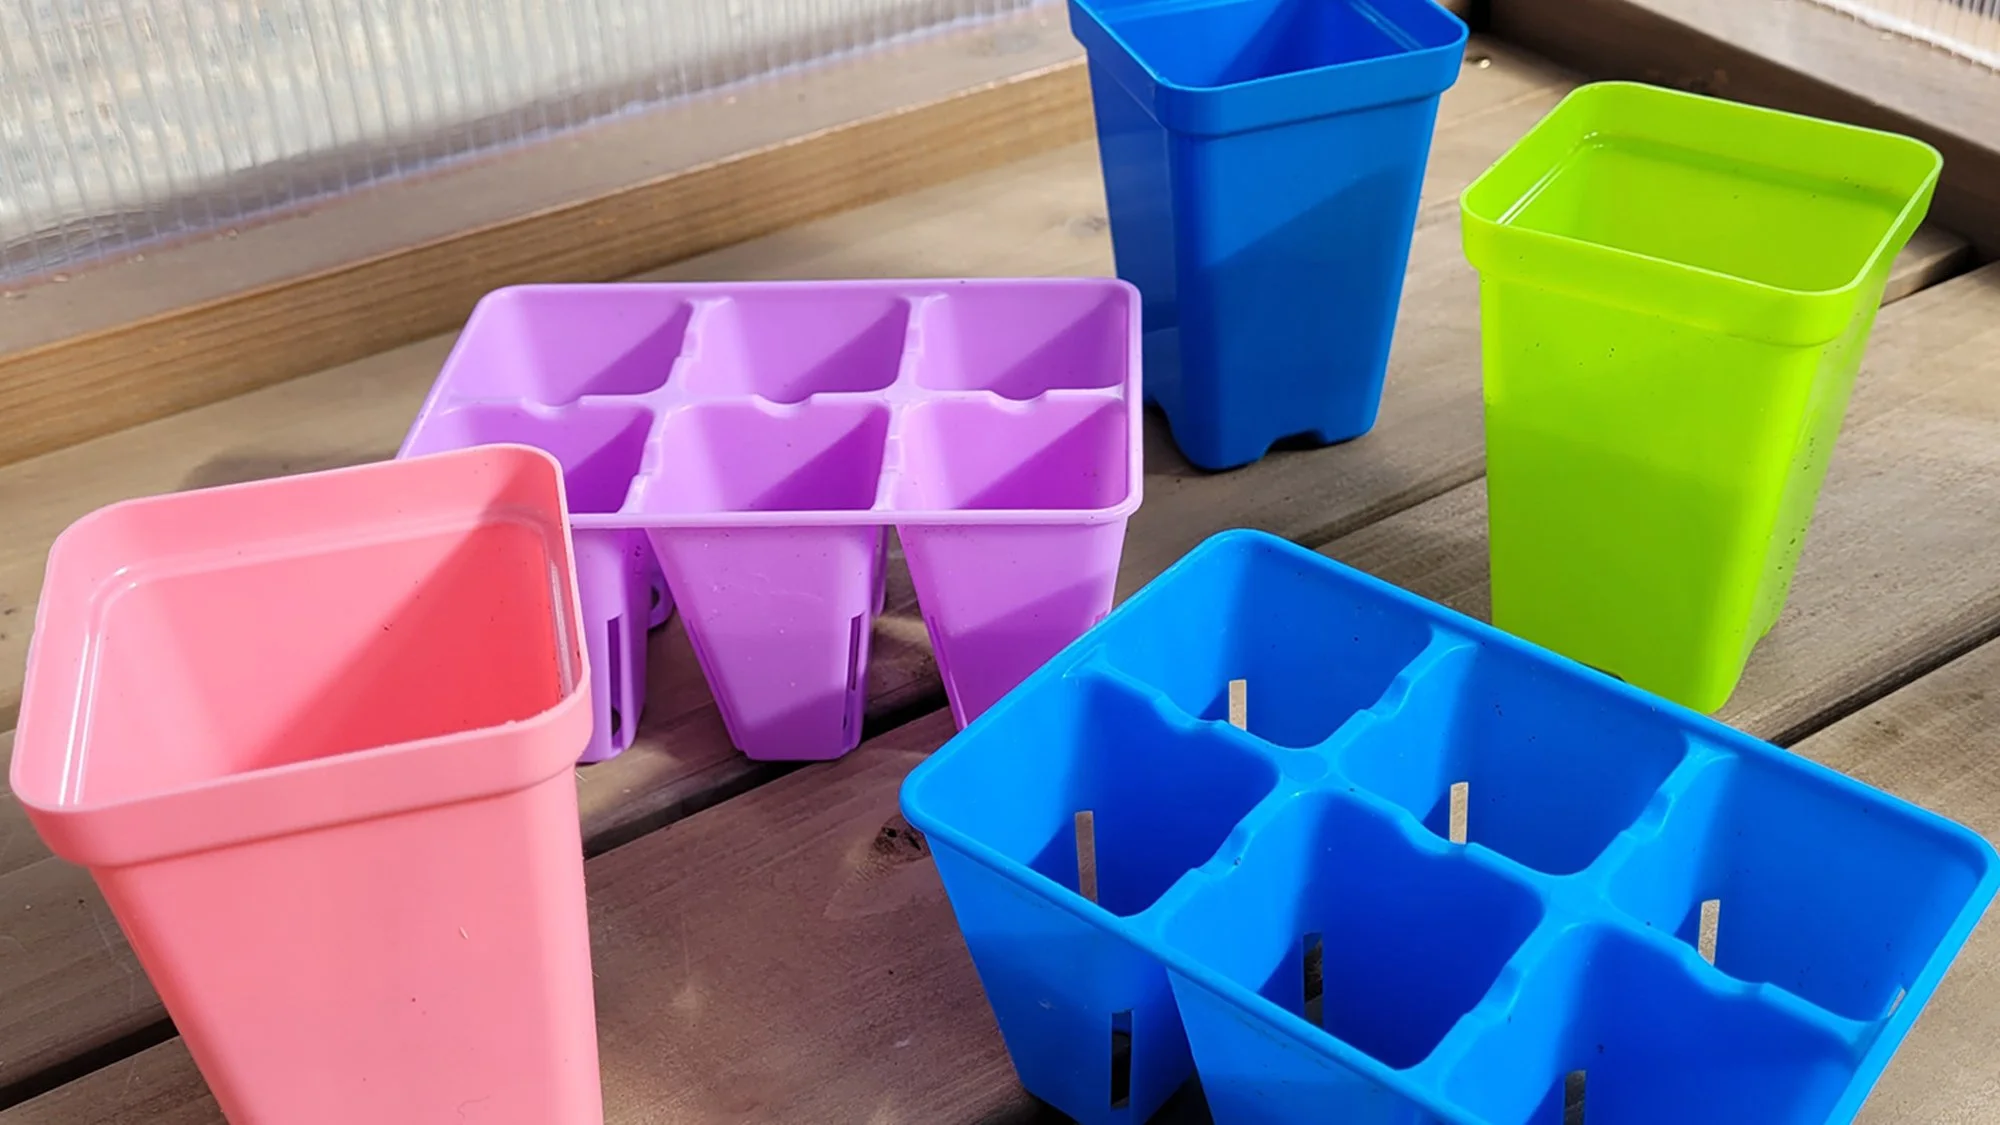
Colorful 6-cell inserts and 2.5 inch pots from Bootstrap Farmer.
Biodegradable seed starting cells and pots are also available but often don’t break down fast enough in our dry environment. If you use these, I don’t recommend planting the pot itself into the ground as it may restrict plant root growth. The exception to this is paper or newspaper pots which degrade faster.
Paper/newspaper - good for small starts but the paper may break down before planting.
Fiber/Wood Fiber
Cowpots
Peat/Coco Coir Pellets
Soil blocking is another method of seed starting. It’s a way of using a specific soil mix and block maker to create potless blocks for seed starting. The soil blocking method will not be covered in this post.
GROW LIGHTS
The subject of grow lights for seed starting can be complicated but we’ll keep it simple in this discussion. LED lights are recommended over fluorescent lights because they use less energy and don’t get as hot.
The most important thing is the light’s color measurement or Kelvin. Warm, yellow lights (think candlelight) have lower Kelvin and bright white lights (think outdoor sun at noon) have higher Kelvin. For seed starting purposes, 5000K - 6500K is adequate. Most lights marketed as “daylight” and “full spectrum” are in this range.

This inexpensive shop light meets all the requirements for a good grow light!
After you’ve verified the Kelvin, look for the lumens measurement. The lumens measurement is more targeted to the human eye and less so to plants. However, plants will grow best with a light that has greater than 3000 lumens.
Although not required, some grow lights are linkable. If so, you can connect them, thereby only having to plug one into the outlet or timer. Speaking of timers, since grow lights should be on for 14-16 hours per day, having a timer would be the most convenient. Also, grow lights will need to be kept close to the plants so they will be lower when the plants are young and raised as they grow. Be sure the lights you choose have that flexibility.
OTHER ITEMS
Heat mats are often needed for seed starting. Some seeds germinate at higher soil temperatures than room temperature and this information should be available on the seed packet or online. Heat mats come in a variety of sizes and it’s best to get one at least the size of a 1020 tray. Once seeds germinate, remove the heat mat and use it for the next tray of seeds, if needed.
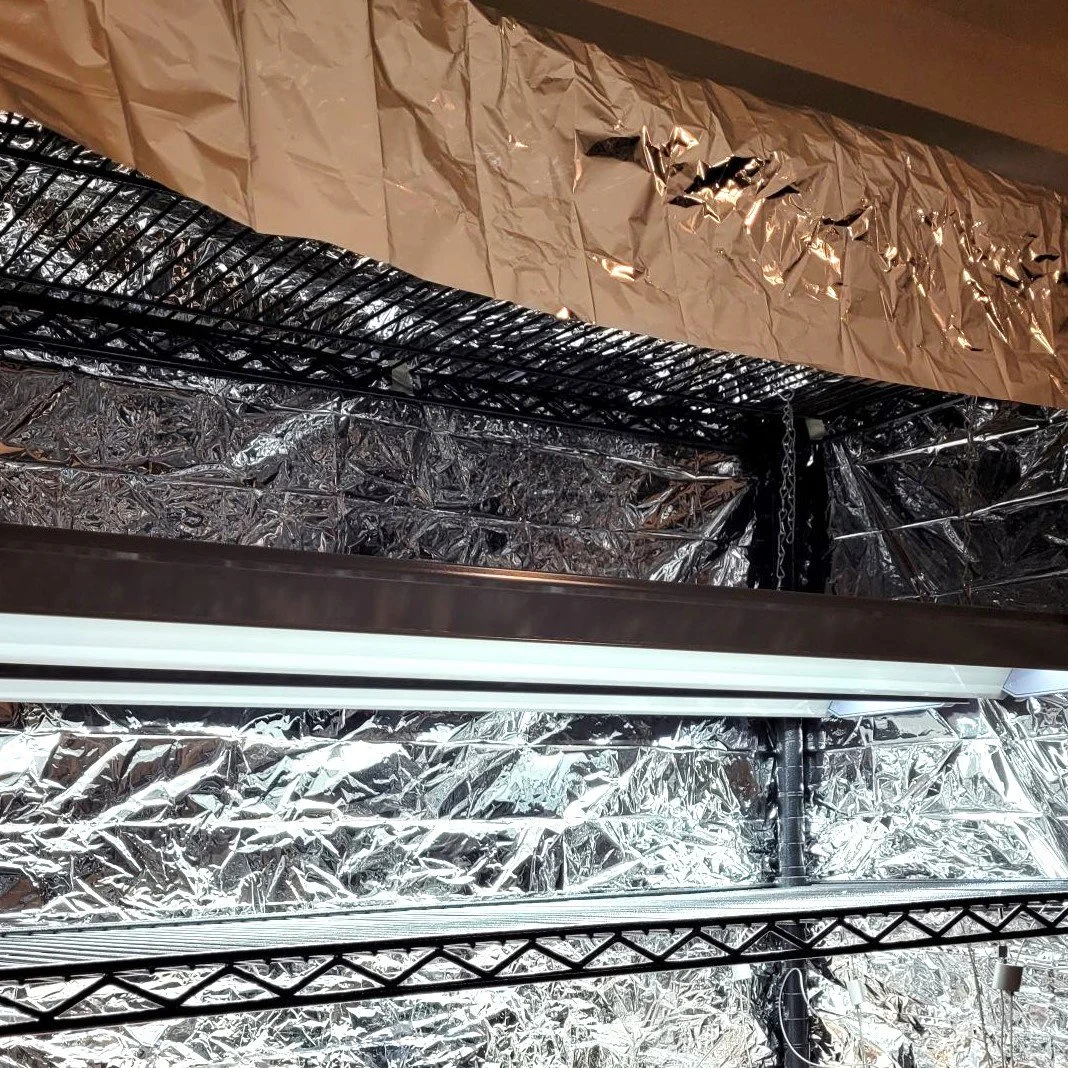
Mylar film is optional but I’ve found it to be a game changer. I wrap the wire rack with the mylar on the back, sides, and bottom of each shelf to reflect the light given off by the grow lights. The result is healthy, lush plants that aren’t leggy or grow in one direction.
Running a fan on growing seedlings causes their stems to strengthen. Alternatively, you could run your hands across the seedlings a few times a day. However, the fan has the added benefit of keeping the soil surface drier to help prevent mold issues.
Quality seed starting mix is essential. Be sure it’s light and fluffy with no large pieces for good germination rates and healthy rooting. Seed starting mixes do not have fertilizer. Therefore, once you see the second set of leaves, begin feeding with half strength organic fertilizer following label instructions. When you pot up to a larger container, use quality potting soil rather than the seed starting mix.
DEDICATED SPACE
To start seeds, you’ll need a dedicated space in a room temperature environment, about 65 - 75 degrees Fahrenheit. Be sure any pets can’t accidentally knock over the seedlings or otherwise get into mischief. As for a surface, it depends on how many trays you plan to have, the available space, and whether or not you could rig up grow lights. When looking at LED grow lights, think about your dedicated space so that the seedlings get adequate light. Will you hang the lights, clip them or have a stand for them?
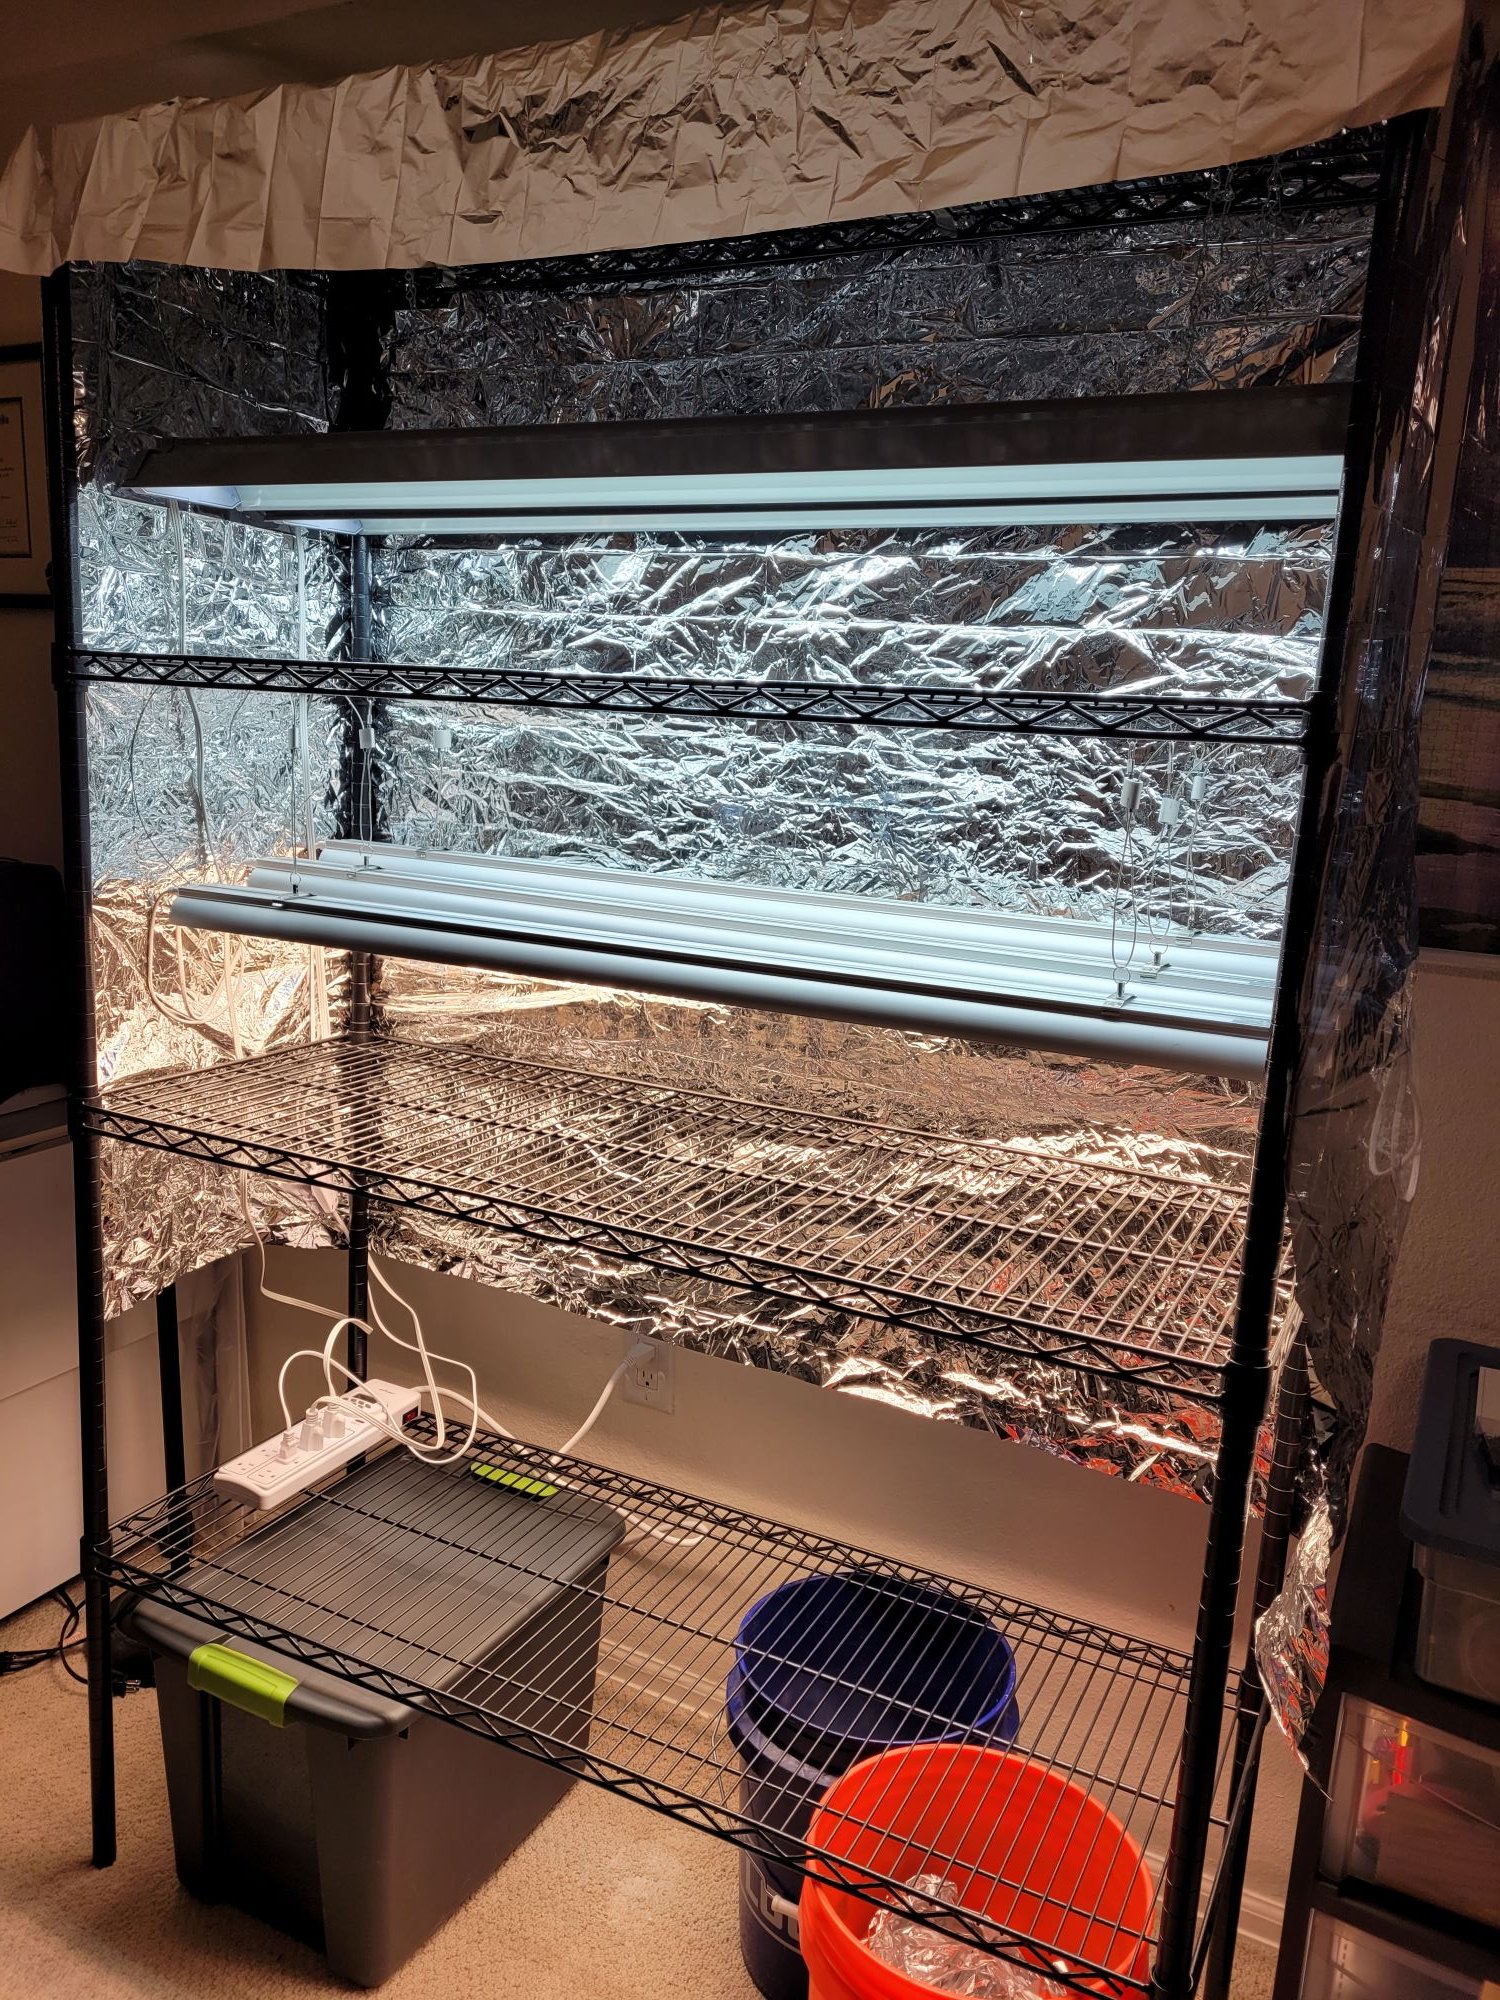
If you have the space, a 5 tier wire shelving rack works well in the heated basement. There’s plenty of room for seed trays, grow lights, soil buckets, and accessories.
SEEDS
Finally, there are the seeds, which are divided into two categories: Open pollinated and hybrid. Open pollinated seeds have been pollinated by wind or insects or are self pollinated. Some open pollinated seeds are heirloom varieties. These are seeds that have been passed down for generations. Hybrid seeds are seeds from controlled pollination to achieve certain plant, fruit, or flowering traits.
TYPES
All seeds can be standard or organic. Organic seeds have had no synthetic fertilizers or pesticides used in production. All home garden seeds sold in the US are non-GMO seeds.
EXPIRATION DATES
Expiration dates are printed on the seed packet and labeled as Sell by: date. In Colorado, most seeds will be good for at least a year past the expiration date if they are stored at room temperature. After that, the germination rates may decrease and a germination test is recommended for older seeds.
This supply list may seem daunting if you’re a beginner seed starter but it doesn’t have to be overwhelming. You can start small with a card table, clip on grow light, and a seeds in recycled yogurt containers. You may not find the process enjoyable or not have the time and would rather purchase the plant starts. That’s perfectly okay! There is no right or wrong way to get started in gardening. Just start somewhere, keep learning, and enjoy the process!
Additional seed starting posts can be found here: